Split Items
Split Items are synonymous with creating Half & Half Pizzas, and can be used to split any menu item across multiple selections. They contain a set of options that apply to the whole item (example: Size, Crust, Cooking Instructions, etc.), with the ability to choose products from available selections to create each half, quarter, etc. of the item, depending on how many splits are allowed.
Here’s how to make a Split Item in the Onosys system:
- Navigate to Split Items in the Root Menu.
- Right Click and select “Create New Split Item.”
- The setup for Split Items will open:
- Details tab:
- These properties are the same as a product, with the exception of “Number of Splits.” This property allows you to indicate the amount of items that the item will be divided into (For example: Half & Half Pizza would have 2 splits, a 4-way sandwich would have 4 splits).
- Availability:
- Same as product and other menu elements.
- Split Item Details:
- Feeds property. This is optional.
- Specialty Products:
- Add the available products that the item can be split with. For Half and Half pizza, this is generally all the available pizzas on the menu.
- Don’t worry about the Correlations for now, we’ll get there after the next step.
- Option Groups:
- Add the shared option groups for the Split Item. This will be correlated to the Specialty Products you entered above.
- This/these option group can be a unique option group made for the Split Item, or it can be an existing option group that exists on the products.
- This/these option groups generally consists of size, and options that are controlled for the whole item and cannot be split
- Example: crust type, cheese, sauce, bread type, etc. If you want an option to be controlled on each split – it should not be included in these option groups.
- Side Dish Groups:
- Add any side dish groups if applicable/necessary.
- Save the Split Item at this point.
Correlations:
We skipped correlations above, here is how to set up correlations for the Specialty Products. In short, these are option groups that will correlate to the option group for the split item, meaning they will be controlled via the item, as opposed to being controlled on each split.
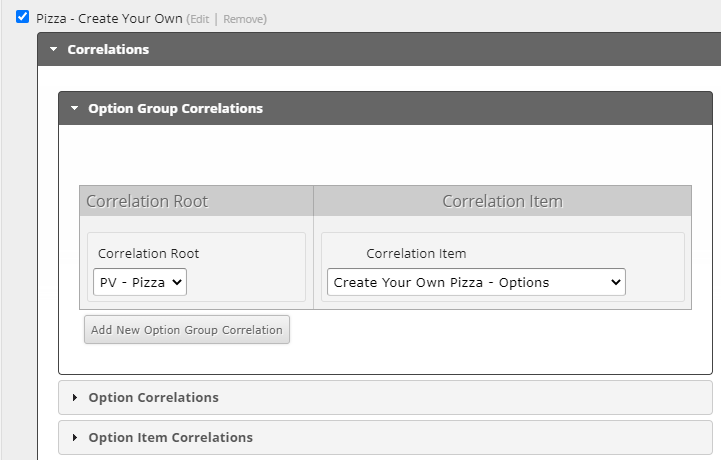
- Open Specialty Products and in the selected items area, expand the "Correlations" accordian.
- Under Option Group Correlations under this view:
- Under Correlation Root, select one of the available option groups - this is a list of the option groups that are placed on the Split Item "Option Groups" section.
- Under Correlation Item, select the option group of the product that you want to correlate (the same) to the Split Item option group. These should have similar properties.
- You can add multiple Option Group Correlations, if necessary.
- Under Option Correlations:
- Under Correlation Root, select one of the available options - this is a list of the options that are contained under the Option Groups that are attached to the Split Item.
- Under Correlation Item, select the option of the product that you want to correlate to the Split Item option. These should have similar properties.
- You can add multiple Option Correlations, if necessary.
- Option Item Correlation:
- This isn’t always necessary, and in most cases is skipped in the builds of the Split Item. If needed, you would follow the above directions to correlate the option items to the Split Item option items.
- Save the Split Item and publish the menu.